Kinh doanh - Marketing
Kinh tế quản lý
Biểu mẫu - Văn bản
Tài chính - Ngân hàng
Công nghệ thông tin
Tiếng anh ngoại ngữ
Kĩ thuật công nghệ
Khoa học tự nhiên
Khoa học xã hội
Văn hóa nghệ thuật
Sức khỏe - Y tế
Văn bản luật
Nông Lâm Ngư
Kỹ năng mềm
Luận văn - Báo cáo
Giải trí - Thư giãn
Tài liệu phổ thông
Văn mẫu
Giới thiệu
Đăng ký
Đăng nhập
Tìm
Danh mục
Kinh doanh - Marketing
Kinh tế quản lý
Biểu mẫu - Văn bản
Tài chính - Ngân hàng
Công nghệ thông tin
Tiếng anh ngoại ngữ
Kĩ thuật công nghệ
Khoa học tự nhiên
Khoa học xã hội
Văn hóa nghệ thuật
Y tế sức khỏe
Văn bản luật
Nông lâm ngư
Kĩ năng mềm
Luận văn - Báo cáo
Giải trí - Thư giãn
Tài liệu phổ thông
Văn mẫu
Thông tin
Điều khoản sử dụng
Quy định bảo mật
Quy chế hoạt động
Chính sách bản quyền
Giới thiệu
Đăng ký
Đăng nhập
0
Trang chủ
Công Nghệ Thông Tin
Đồ họa - Thiết kế - Flash
Mastering Autodesk 3ds Max Design 2011 phần 5
Đang chuẩn bị liên kết để tải về tài liệu:
Mastering Autodesk 3ds Max Design 2011 phần 5
Vĩnh Thụy
89
97
pdf
Đang chuẩn bị nút TẢI XUỐNG, xin hãy chờ
Tải xuống
Mở rộng việc triển khai biến dạng và sau đó nhấp vào Quy mô, như thể hiện trong hình 7,30. Quy mô thay đổi kích thước, hướng X hoặc Y, của đối tượng loft. Hướng Z luôn luôn điểm dọc theo con đường, X và Y-trục vuông góc với đường dẫn. | lofting an object 363 3. Expand the Deformations rollout and then click Scale as shown in Figure 7.30. Scale changes the size in the X or Y direction of the loft object. The Z direction always points along the path the X- and Y-axes are always perpendicular to the path. This opens the Scale Deformation X dialog box shown in Figure 7.31. The red line currently at a value of 100 indicates that the scale of the loft is consistently at 100 percent of its designed size. In other words all the cross sections appear at the same size as their instanced counterparts. The black boxes at the end of the red line represent the corner points where the scale is defined. To change the scale you would move a corner point upward to increase it or downward to decrease it. FIGURE 7.30 The Scale Deformation button FIGURE 7.31 The Scale Deformation X dialog box for the pedestal loft object s 4. Make sure the Make Symmetrical button in the Scale Deformation box s toolbar is active. In this exercise only the scale of the X-axis is changed but the Make Symmetrical button forces the Y-axis to match the X-axis. 5. You want to change the scale at the middle of the object but not at the ends so you ll need to add a new corner point at the midpoint of the path. Click the Insert Corner Point button. 6. Click on the red line about halfway along its length. A white box appears showing the location of the new corner point. Like most objects in 3ds Max selected corner points are white. Unselected corner points are black. There are two fields at the bottom of the dialog box. The left field is the location as a percentage of the path of the selected corner point. The right field is the value as a percentage of scale of the loft at that corner point. 7. In the left field enter 50J. In the right field enter 125J see Figure 7.32 . The pedestal shaft bows outward at 50 percent along the path see Figure 7.33 . 364 chapter 7 organizing and editing objects Figure 7.32 Moving the midpoint vertex FIGURE 7.33 .
TÀI LIỆU LIÊN QUAN
Mastering Autodesk® Inventor® 2012 and Autodesk® Inventor LT™ 2012
Mastering Autodesk VIZ 2007
Mastering Autodesk Maya 2011 phần 1
Mastering Autodesk Maya 2011 phần 2
Mastering Autodesk Maya 2011 phần 3
Mastering Autodesk Maya 2011 phần 4
Mastering Autodesk Maya 2011 phần 5
Mastering Autodesk Maya 2011 phần 6
Mastering Autodesk Maya 2011 phần 7
Mastering Autodesk Maya 2011 phần 8
crossorigin="anonymous">
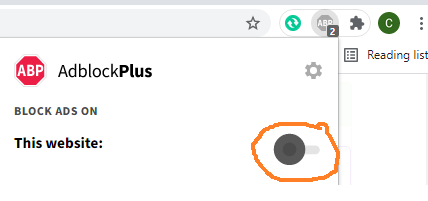
Đã phát hiện trình chặn quảng cáo AdBlock
Trang web này phụ thuộc vào doanh thu từ số lần hiển thị quảng cáo để tồn tại. Vui lòng tắt trình chặn quảng cáo của bạn hoặc tạm dừng tính năng chặn quảng cáo cho trang web này.